Spicy Szechuan Green Beans with Ground Turkey

DSC_0174

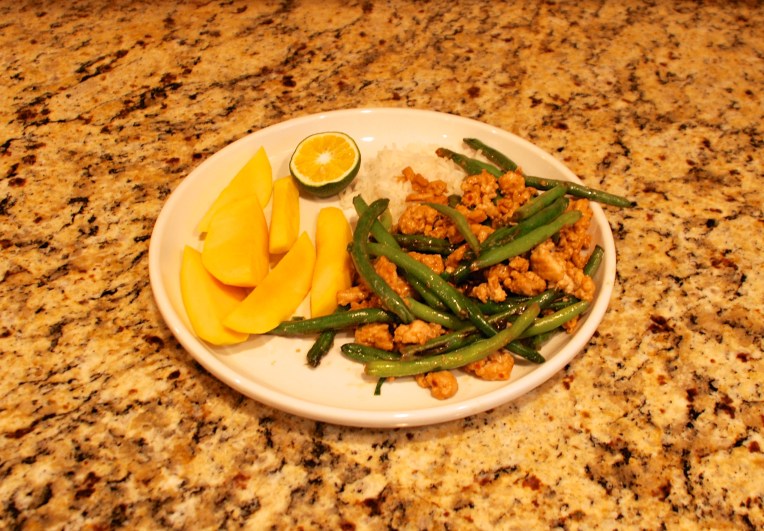
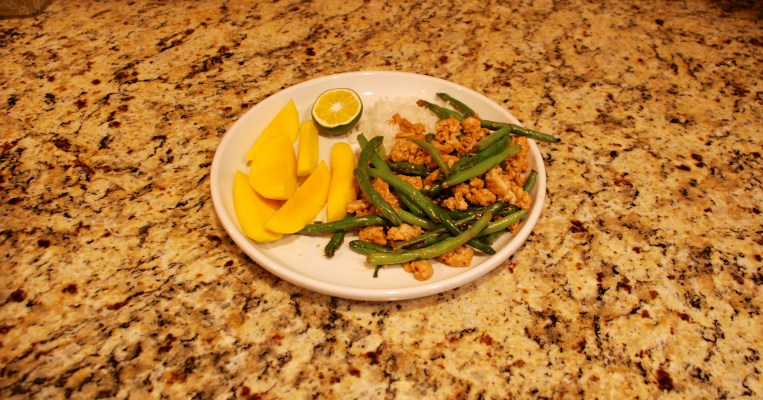
Our family really enjoyed this dish. Let me rephrase that. My husband and I really enjoyed this dish. To be honest, green beans are not a favorite food of either of my boys. But we asked that they eat four beans each and their turkey with the promise of mangoes afterwards!

I really enjoyed how light and fresh this meal tasted. I ate mine sans rice, we’re trying to be more carb conscious around here. But I still make grains and starches for my kiddos to enjoy. As always, it was a quick, easy, delicious dinner on what have been increasingly busy nights for us.

Do you have any Asian-fusion dishes you’d like to share! I’d love to know any of your favorites. You can comment below. I am always looking for good recipes. We’re rolling through Wednesday, and I couldn’t be more glad. Tonight I hope to get out on my road bike and make a good ride of it! Have a great day, friends!

XX, Megan

DSC_0136

Ingredients

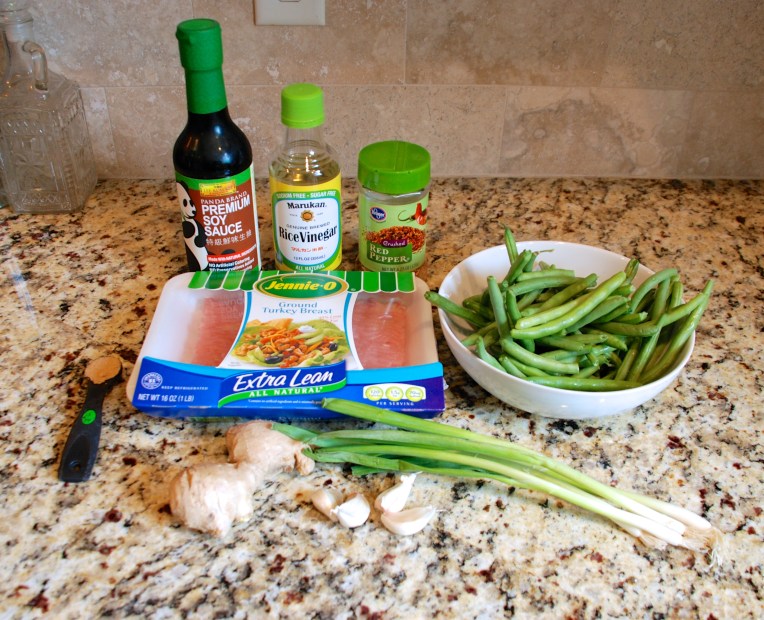
3 Tbsp. reduced-sodium soy sauce or tamari (use wheat/gluten-free if needed)
1 Tbsp. rice wine, mirin or dry sherry
1 tsp. brown sugar
1 tsp. cornstarch
1/4 – 1/2 tsp. crushed red pepper flakes, to taste (optional)
1 Tbsp. vegetable or coconut oil
1 lb. green beans, ends trimmed and cut in half, or use frozen
1 lb. ground turkey, pork or meatless crumble
2 tsp. minced garlic, (3 – 4 cloves)
1 Tbsp. fresh ginger, peeled and minced
1/4 cup scallions or chives, thinly sliced

Directions

(Start the rice first, if you are serving it.) In a small bowl or measuring cup, whisk together the soy sauce, rice wine, brown sugar, cornstarch and red pepper flakes (optional). Set it aside.

Heat a large nonstick skillet over high heat and add the oil. When it is smoking, add the beans (if using frozen beans, defrost them first) and cook, stirring frequently, until they are shriveled and black in spots, 5 – 8 minutes. (Meanwhile, slice the mango, if you are serving it.) Reduce the heat if necessary to keep them from burning. Transfer the beans to a plate.

Reduce the heat to medium and add the turkey, pork or meatless crumble. Cook until no pink remains, about 5 minutes, then add the garlic and ginger, stirring until fragrant, about 1 minute. Return the beans to the pan, stir the sauce again, and add it to the pan. Cook until heated through and the sauce is thickened, about 1 minute. Stir in the scallions or chives and serve it immediately, or refrigerate it for up to 3 days, or freeze it for up to 3 months.

DSC_0172

*The Scramble is a meal planning service to which you can subscribe here. For a fantastic price you will receive 8 weekly meals which means 8 recipes (main course plus a side dish), complete grocery list, the ability to tweak the number of people you are making for, and full nutrition facts.

PLUS tips as to how best to PREP your meal beforehand, add a punch of FLAVOR, and how to SLOW COOK almost every recipe if you’re especially slammed that night. This wonderful service really does live up to it’s name. You can come home at 6 p.m. and be sitting down to a DELICIOUS, HEALTHY, HOME COOKED meal by 6:30 p.m. most nights.

Fresh Spring Rolls

DSC_0186

Fresh rolls are one of my all-time favorite eats. I love the pop of the fresh ingredients with sweet and sour sauce or peanut sauce. I love the chew of the rice paper, and how they fill you up but are light and FRESH at the same time!

The other great thing about fresh rolls is that you don’t necessarily have to stick to the same ingredients. You can make them from different stuff each go-round. While the rolls are easy to make, they do take me some time. I am not yet a master of the wrap, and it does take some additional time to soak each rice paper. Just a note, so that you can plan that time into your dinner schedule. With prep, they may take as long as 30-45 minutes.

We ate these Fresh Rolls with the Indonesian Chicken Satay recipe I posted today. These rolls are also the perfect compliment to stir-fry, pad Thai, and any curry soup you feel like concocting. I hope you thoroughly ENJOY!!

XX, Megan

DSC_0177

Ingredients

10 rice paper wraps
1 avodcado
1/2 large red bell pepper julienned
1/2 head purple cabbage (I subbed shredded broccoli this time)
1/2 carrots julienned (1 large or 2 medium)
1 large cucumber julienned
1/4 cup cilantro (you can also use mint, basil, chives or all four!)
1 cup greens (I used spring mix, but romaine also works well)
1 can shrimp (or 20 peel and eat shrimp, cooked, and thinly sliced)


DSC_0183

Directions

Cut, slice, and chop all of your ingredients, and lay them out on a cutting board or a baking sheet so they are easily accessible.

Place warm water in a 9 ” round baking pan, or on a 9″ square baking sheet.  I used the latter. Soak each rice paper for 10-15 seconds. Transfer the rice paper to a plate, cutting board, or other flat surface.

Place your ingredients in the far 1/3 of your rice paper. Make sure not to overfill your wrapper. Ingredients may roughly fill 1/2 cup or 3/4 cup. Picking up the end of your rice paper closest to your filling. Wrap it tightly around your ingredients. Try to make the roll shape with this first wrap.

Roll once more around, and then tuck in the sides or edges of your rice paper like a burrito. Once your edge are tucked in, your ingredients should be completely contained. Finish rolling your wrapper to the end of the paper. Set rolls aside on a serving plate.

Indonesian Chicken Satay with Peanut Sauce and Broccoli Slaw

DSC_0200

This meal is almost as pretty to look at as it is delicious to eat… Almost. Because it really is one of the most delicious meals we’ve had here at casa Refined + Rugged. YUM! In fact, if you head over to Refined + Rugged’s Facebook page to see my husband’s comment on it!

I’m posting the Indonesian Chicken Satay from The Scramble*. I’ll also be posting my Fresh Roll recipe today to accompany this meal. The combination is absolutely irresistible. I’m sure we’ll be coming back to this meal time and again this summer. I hope your tastebuds are ready to be tickled.

Happy Wednesday, and a happy healthy meal time to you!!

XX, Megan

DSC_0123

Ingredients

4 Tbsp. + 1 tsp reduced-sodium soy sauce (use wheat/gluten-free if needed)
2 Tbsp. + 1 tsp. honey
2 Tbsp. vegetable oil
2 tsp. minced garlic, (about 4 cloves)
2 tsp. fresh ginger, peeled and minced
1/4 tsp. crushed red pepper flakes (optional)
2 lbs. chicken tenderloins or boneless, skinless chicken breasts, cut into 1-inch wide strips

Skewers


Directions

In a small bowl, mix together 4 Tbsp. soy sauce, 2 Tbsp. honey, the oil, garlic, 1 tsp. ginger, and the red pepper flakes (optional). Put the chicken in a large dish with sides, pour the marinade over it, and turn the chicken several times to coat it. Cover and refrigerate it for at least 30 minutes and up to 24 hours. (While the chicken is marinating, prepare the slaw, if you are serving it. Recipe below.)

When you are ready to cook the chicken, preheat the grill or the broiler (with the rack about 4 inches from the heat), and coat a grilling tray or baking sheet with nonstick cooking spray or line it with foil.

Remove the chicken from the marinade and skewer each piece as you transfer it to the tray or pan, discarding the marinade. Grill or broil the chicken for 4 – 5 minutes per side until it is cooked through and the edges are browned.

While the chicken is cooking, make the peanut sauce. Recipe below.

Note: Make sure you soak your skewers in water before baking or grilling.

DSC_0165DSC_0170

Ingredients


1 12 oz bag of broccoli slaw
1/2 cup shredded carrots
1/2 cup shredded green apple

1/3 cup mayonnaise
1/8 cup rice wine vinegar
1/3 cup slivered almonds
2 tbsp vegetable oil
1 tbsp honey

Directions

Pour the broccoli slaw into a medium bowl. Mix in the carrots and green apple. In a measuring cup mix the mayonnaise, vinegar, oil, and honey. Pour the dressing over the slaw and mix.

DSC_0149

Ingredients

1/2 cup hot water
1/2 cup all natural peanut butter
1 tsp. soy sauce
1 tsp. honey
1 lime, juice only
1 tsp. ginger, minced
2 cloves garlic, minced

As much chili past or Sriracha as you’d like! I used 2 tsp chili paste for my sauce.

Directions

In a medium bowl, whisk together ½ cup hot water, the peanut butter, lime juice, 1 tsp. soy sauce, 1 tsp. honey and 1 tsp. ginger until it is smooth.

*The Scramble is a meal planning service to which you can subscribe here. For a fantastic price you will receive 8 weekly meals which means 8 recipes (main course plus a side dish), complete grocery list, the ability to tweak the number of people you are making for, and full nutrition facts.

PLUS tips as to how best to PREP your meal beforehand, add a punch of FLAVOR, and how to SLOW COOK almost every recipe if you’re especially slammed that night. This wonderful service really does live up to it’s name. You can come home at 6 p.m. and be sitting down to a DELICIOUS, HEALTHY, HOME COOKED meal by 6:30 p.m. most nights.

Quick Chicken Tikka Masala

DSC_0146

I really enjoy Indian food. While I’m sure this recipe stands as a little less than authentic, it was perfect for a week-night meal. Even the kiddos were participants, and though I think it tested the limits of their palate, they moped up their portions with flat bread.

I do want to note that I basically used 3/4 of each spice measuring. Meaning that if the recipe called for 1 tsp. I used a little bit less. This worked well for us, and next time I will also be sure to use a little bit less ginger. I sort of went wild and I think I used more than the recipe called for. Another addition I will make next time is that of heavy cream. I’d add no more than 2-3 tbsps. but I think it would play out well in this combination.

Last but not least, I wouldn’t serve this meal without the yogurt. It was absolutely the perfect add-in. My boys could add in as much or as little as they liked, and it makes the dish even creamier.

I hope your Wednesday is a good one!

XX, Megan

DSC_0118

Ingredients

1 (2 1/2″) piece ginger, peeled

4 garlic cloves, peeled

1/2 medium yellow onion

1 1/2 pounds boneless skinless chicken breasts (about 3 breasts), cut into 1: cubes

2 teaspoons kosher salt, plus more to taste

3/4 teaspoon freshly ground black pepper, divided, plus more to taste

2 1/2 teaspoons garam masala, divided

2 tablespoons vegetable oil (or use olive oil)

2 tablespoons unsalted butter

1 tablespoon tomato paste

1 1/2 teaspoon turmeric

1/8-1/4 cayenne pepper

1 (28 ounce) can crushed tomatoes

1 (10 ounce) package frozen peas, thawed

1/2 cup plain full-fat or low-fat yogurt (not Greek)

1 tablespoon fresh lemon juice

1/4 cup fresh cilantro

Naan (Indian flatbread; for serving)

Using a hand immersion blender or another food processor, pulse ginger and garlic until finely chopped. Add onion and pulse again until finely chopped.

Toss chicken with 1 tsp. salt, 1/2 tsp. pepper, 1 tsp garam masala in a medium bowl.

Heat oil over high heat in a large skillet (at least 12″ in diameter). Add chicken and cook, tossing occasionally, until lightly browned and cooked through, about 5 minutes. Transfer chicken to a clean medium bowl.

Heat same skillet over medium-high and add butter, chopped onion mixture, and 1/2 tsp salt, and 1/4 tsp. pepper. Cook, stirring occasionally, until onion is softened and translucent, about 3 minutes. Add tomato paste, turmeric, cayenne, and remaining 1 tsp. garam masala and cook, stirring constantly, about 30 seconds. Add tomatoes and cook, stirring occasionally, until hot, about 2 minutes. Return chicken to pan, add peas, and cook, stirring occasionally, until warmed through, about 1 minute more.

Remove from heat and stir in yogurt and lemon juice.

This recipe was taken from Epicurious.com.

DSC_0148

Pollo a la Brasa with Grilled Pineapple (Peruvian Grilled Chicken)

DSC_0139

Get geared up for many a Summer evening grill-fest with this delicious Peruvian style chicken from The Scramble*. Beyond the fact that it is best to marinate the chicken between 8 and 24 hours ahead of time, meaning I have remember to get my stuff together a day in advance,  this recipe is a cinch!

The chicken was flavorful without being too strong, and so moist and delicious. This was our first meal on the grill for the season, and I couldn’t be more pleased with how it turned out.

Make sure that you follow the directions to turn your grill heat down to low, and let the chicken cook slowly. I tried to turn my heat up too high at the beginning and ended up getting a whole lot of GRILL without a lot of COOKING in the middle of my chicken! I remedied the problem by turning my grill down very low for the last 30 minutes or so of cook-time.

I hope you have a delicious Wednesday, and that this meal treats your family as wonderfully as it did ours! Much love.

XX, Megan

DSC_0123

Ingredients

1 Tbsp. brown sugar
2 tsp. ground cumin
1 tsp. paprika
1/2 tsp. black pepper
1 tsp. dried oregano
2 Tbsp. Worcestershire sauce
1 lime, juice only, about 2 Tbsp.
1 Tbsp. extra virgin olive oil
2 tsp. minced garlic, (3 – 4 cloves)
1 whole chicken, quartered

Directions

In a small bowl, whisk together all the ingredients for the marinade. Put the chicken in a large flat container and pour the marinade evenly over it. Flip the chicken a couple times to coat it in the marinade. Then cover it and place it in the fridge. Marinate the chicken for at least 8 hours and up to 24 hours (the longer the better), shaking or flipping it a couple of times. By the time the chicken is done marinating, most of the marinade will have been absorbed.

Preheat the grill to high heat and then turn the back burner to its lowest setting and put the chicken, skin side down, over the back burner, so it is over indirect heat. Grill the chicken for 15 – 20 minutes, then flip it and grill it for 15 – 20 more minutes until the skin is nicely browned and the chicken is cooked through (cut into the thickest part of the breast with a sharp knife to make sure there is no pink remaining). (Alternatively, you can roast the chicken at 450 degrees, covered for 15 minutes and then uncovered for 20 – 25 minutes.)

DSC_0142

*The Scramble is a meal planning service to which you can subscribe here. For a fantastic price you will receive 8 weekly meals which means 8 recipes (main course plus a side dish), complete grocery list, the ability to tweak the number of people you are making for, and full nutrition facts.

PLUS tips as to how best to PREP your meal beforehand, add a punch of FLAVOR, and how to SLOW COOK almost every recipe if you’re especially slammed that night. This wonderful service really does live up to it’s name. You can come home at 6 p.m. and be sitting down to a DELICIOUS, HEALTHY, HOME COOKED meal by 6:30 p.m. most nights.